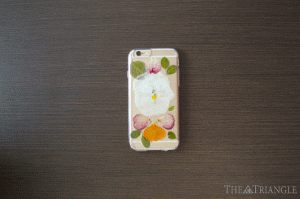
When it comes to personalizing electronic gadgets, the clear phone case is my best friend. Not only because it is relatively inexpensive, but also because it is extremely versatile when it comes to easy and painless do-it-yourself projects. In this tutorial, we will be creating a pressed flower phone case. Just because the weather is chillier does not mean I can quite give up floral designs yet! If you are not a fan of flowers for the fall, feel free to use other materials as a substitute. Other ideas for personalizing your phone case are: using photographs, washi tape, glitter nail polish, or even fabric in a bold design.
Materials: clear phone case, clear adhesive (such as glue or nail polish), small paintbrush, pressed flowers
Directions:
Pressing your own flowers is easy, but takes a little bit of time. Simply place your petals and leaves flat within a heavy book or magazine. The drying process typically takes a minimum of five days, depending on the size and type of your petals. After allowing the petals to dry, carefully arrange them on a flat surface until you have your desired design. Take a quick picture of the design for future reference, as you will be moving the petals around to adhere them to the case. Slowly use clear craft glue and the paintbrush to adhere the petals to the inside of the case. Use thin layers of glue, as some petals will become translucent if too much glue is applied. If you don’t have glue, you can also use clear nail polish for this step. Allow the case to dry overnight, and enjoy your new floral phone case!


